03. Eating and Keeping Score
In this chapter, we will add pills for the player to eat, handle collisions to know when a pill has been eaten, keep a score of the pills eaten, and display this score in the UI. We start as usual, in the Tiled editor. A new version of the level file, with pills added, can be copied from here.
Adding Pills
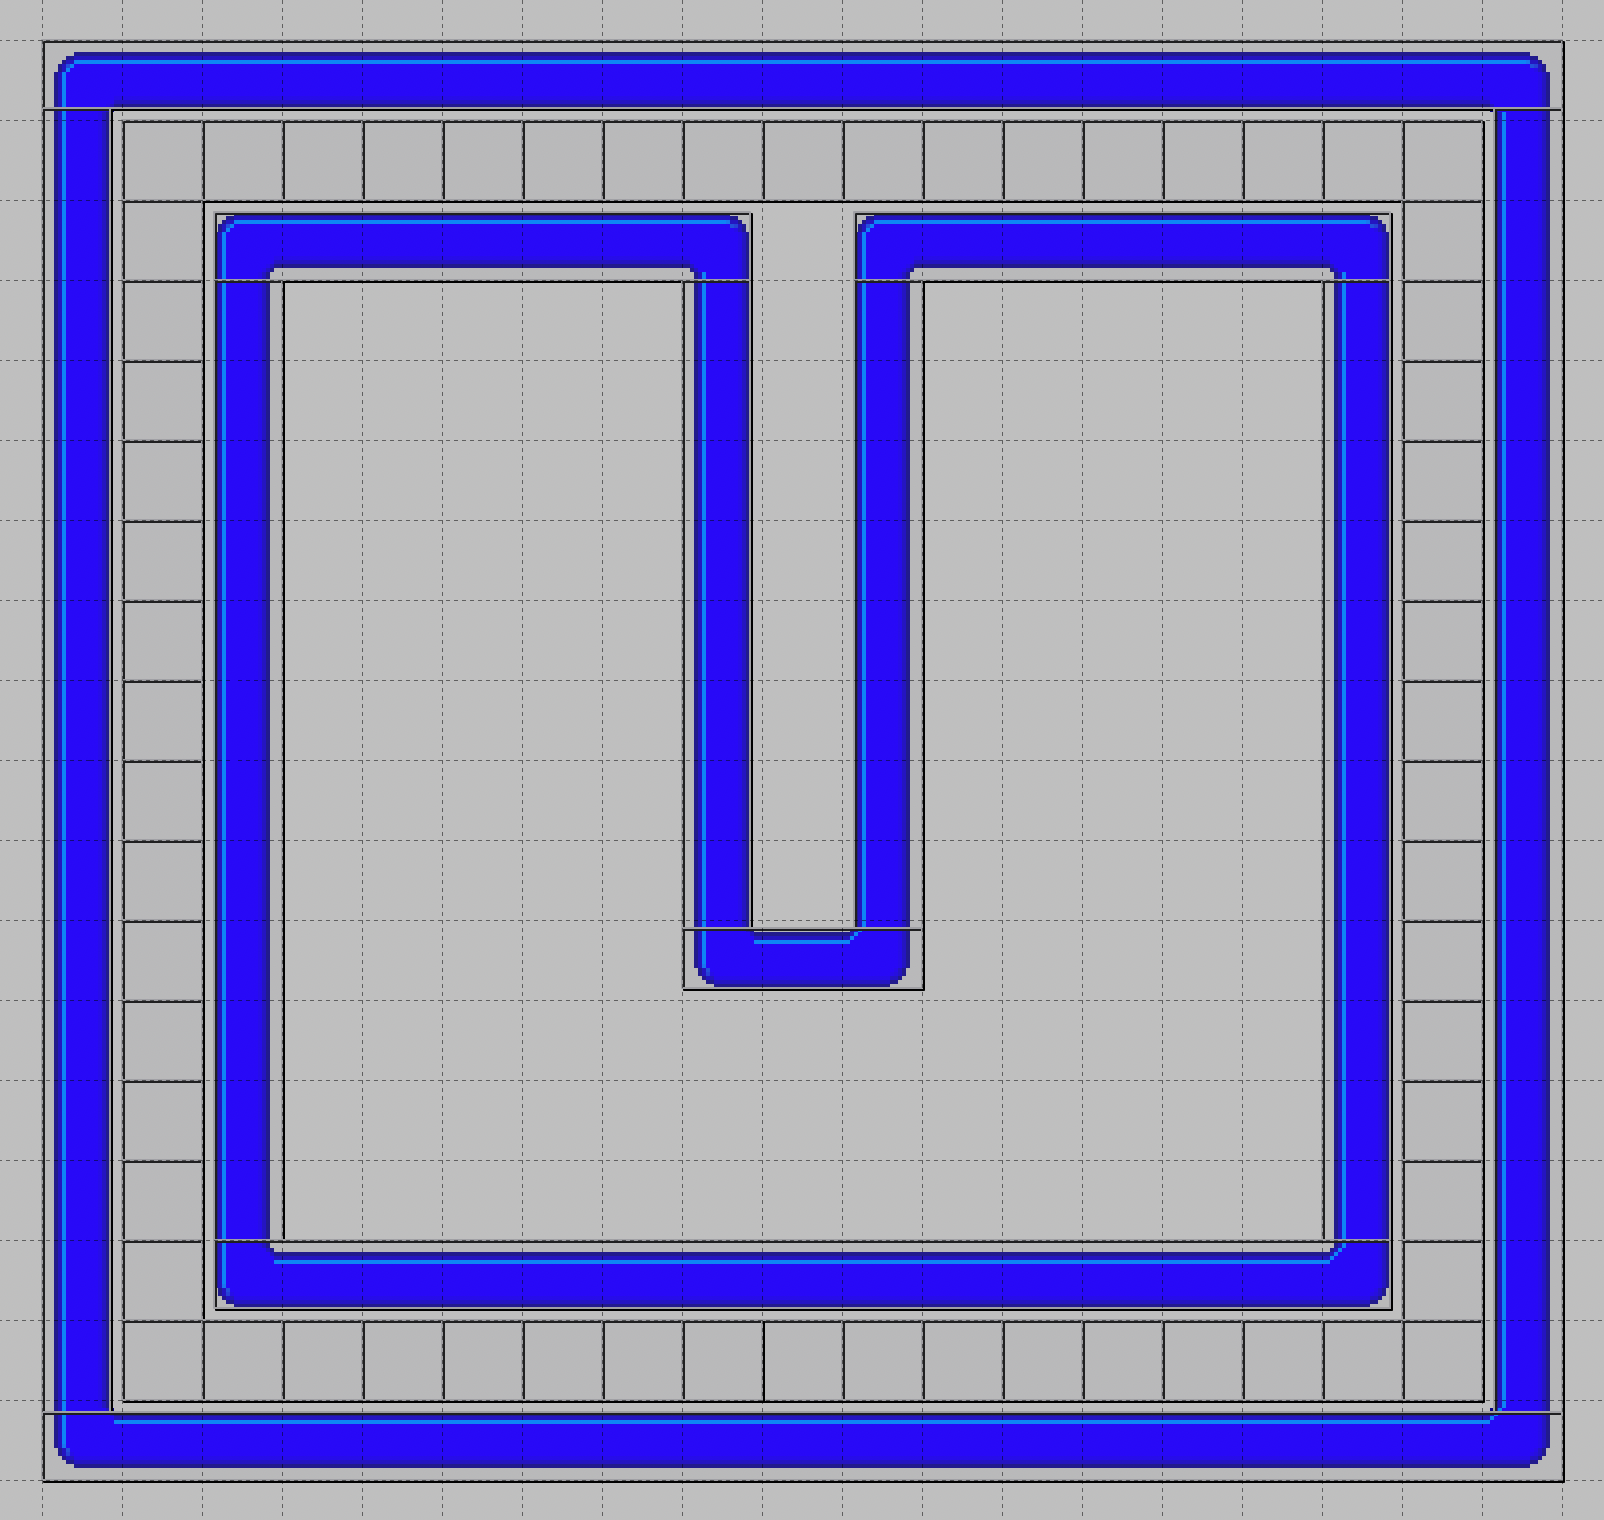
Open the level file for this chapter in Tiled, and add objects for as many pills you want in your level. Make the objects 20x20 pixels in size, like a square in the grid. This will be easier to do if you set snapping to “Snap to Grid”. Remember to set the type string of all pill objects to “Pill”. As you already know by now, we will use that string in the entity factory.
This is how my level looks in Tiled after adding all the pills.
In the entity factory, we add the corresponding spawn method.
    @Spawns("Pill")
    public Entity spawnPill(SpawnData data) {
        return FXGL.entityBuilder(data)
                .type(EntityType.PILL)
                .view("pill.png")
                // Make hit box a little smaller than the tile to fit the visible part of the image
                .bbox(new HitBox("PILL_HIT_BOX", new Point2D(5, 5), BoundingShape.box(9, 9)))
                .collidable()
                .build();
    }
We need to create a new enum constant in EntityType, and we need to copy the pill image to the
textures folder from here.
This time we don’t create the bounding box automatically from the image. That is because the image is 20x20 pixels, but the actual pill is only 9x9 pixels. To make the collision look better, we instead create a bounding box that is a little smaller than the image, trying to fit it to the actual pill.
We also call the collidable method on the builder, which is just a convenience method for
adding a CollidableComponent to the entity. This lets the entity take part in FXGL’s own
collision detection. We want the player entity to also be collidable, so we add that call to
the entity builder for the player entity as well.
        return FXGL.entityBuilder(data)
                .type(EntityType.PLAYER)
                .viewWithBBox("player.png")
                .with(physics)
                .collidable()
                .build();
Collision Detection
To facilitate collision detection, we update the initPhysics method to add a collision handler.
    @Override
    protected void initPhysics() {
        PhysicsWorld physics = FXGL.getPhysicsWorld();
        physics.setGravity(0, 0);
        physics.addCollisionHandler(new CollisionHandler(EntityType.PLAYER, EntityType.PILL) {
            @Override
            protected void onCollisionBegin(Entity player, Entity pill) {
                pill.removeFromWorld();
            }
        });
    }
The arguments to the CollisionHandler constructor are the types of entities we want to handle
collisions between. The order is important here. The callback methods, like onCollisionBegin,
will receive their arguments in the same order as specified when calling the constructor. In
our case, we want to handle collisions between the player and a pill. We override the callback
method onCollisionBegin that is called just when a collision between two objects has started.
There are other callbacks like onCollision, that is called every frame while the collision
is happening.
In the callback method, we simply remove the pill from the game world. That makes the entity disappear completely, with view and bounding box and all.
Keeping Score
The player should score a number of points for each pill eaten, and we want to keep track of
that score, and display it in the UI. For that we will use a game variable. Game variables
are basically just a map from String to Object, a number of global variables used throughout
the game. In our case, we will only use it in the main app class, but there are benefits with
using game variables that we will take advantage of later.
We start by initializing the score to 0. That can be done in, you guessed it, the overridden
method initGameVars.
    @Override
    protected void initGameVars(Map<String, Object> vars) {
        vars.put("score", 0);
    }
Next, we want to increase the score when the player eats a pill, so we update the collision
handler and add a statement to do that. The inc method is a convenience method that
increments (or decrements) an integer game variable.
FXGL.inc("score", 10);
The final step is to display the score in the game window. Now we bring back the method
initUI to initialize a label to display the score.
    @Override
    protected void initUI() {
        Label scoreLabel = new Label();
        scoreLabel.setTextFill(Color.LIGHTGRAY);
        scoreLabel.setFont(Font.font(20.0));
        scoreLabel.textProperty().bind(FXGL.getip("score").asString("Score: %d"));
        FXGL.addUINode(scoreLabel, 20, 10);
    }
Here we create a JavaFX label, like we did in the very first, Hello FXGL app. What is new is that we bind the text property of the label to an integer property that represents the score game variable, and at the same time transform the integer to a string. This is JavaFX magic. By binding the label text property to the score integer property, the label text will be automatically updated whenever the score is updated. No extra code to keep them in sync, no event handling. JavaFX does it all for you.
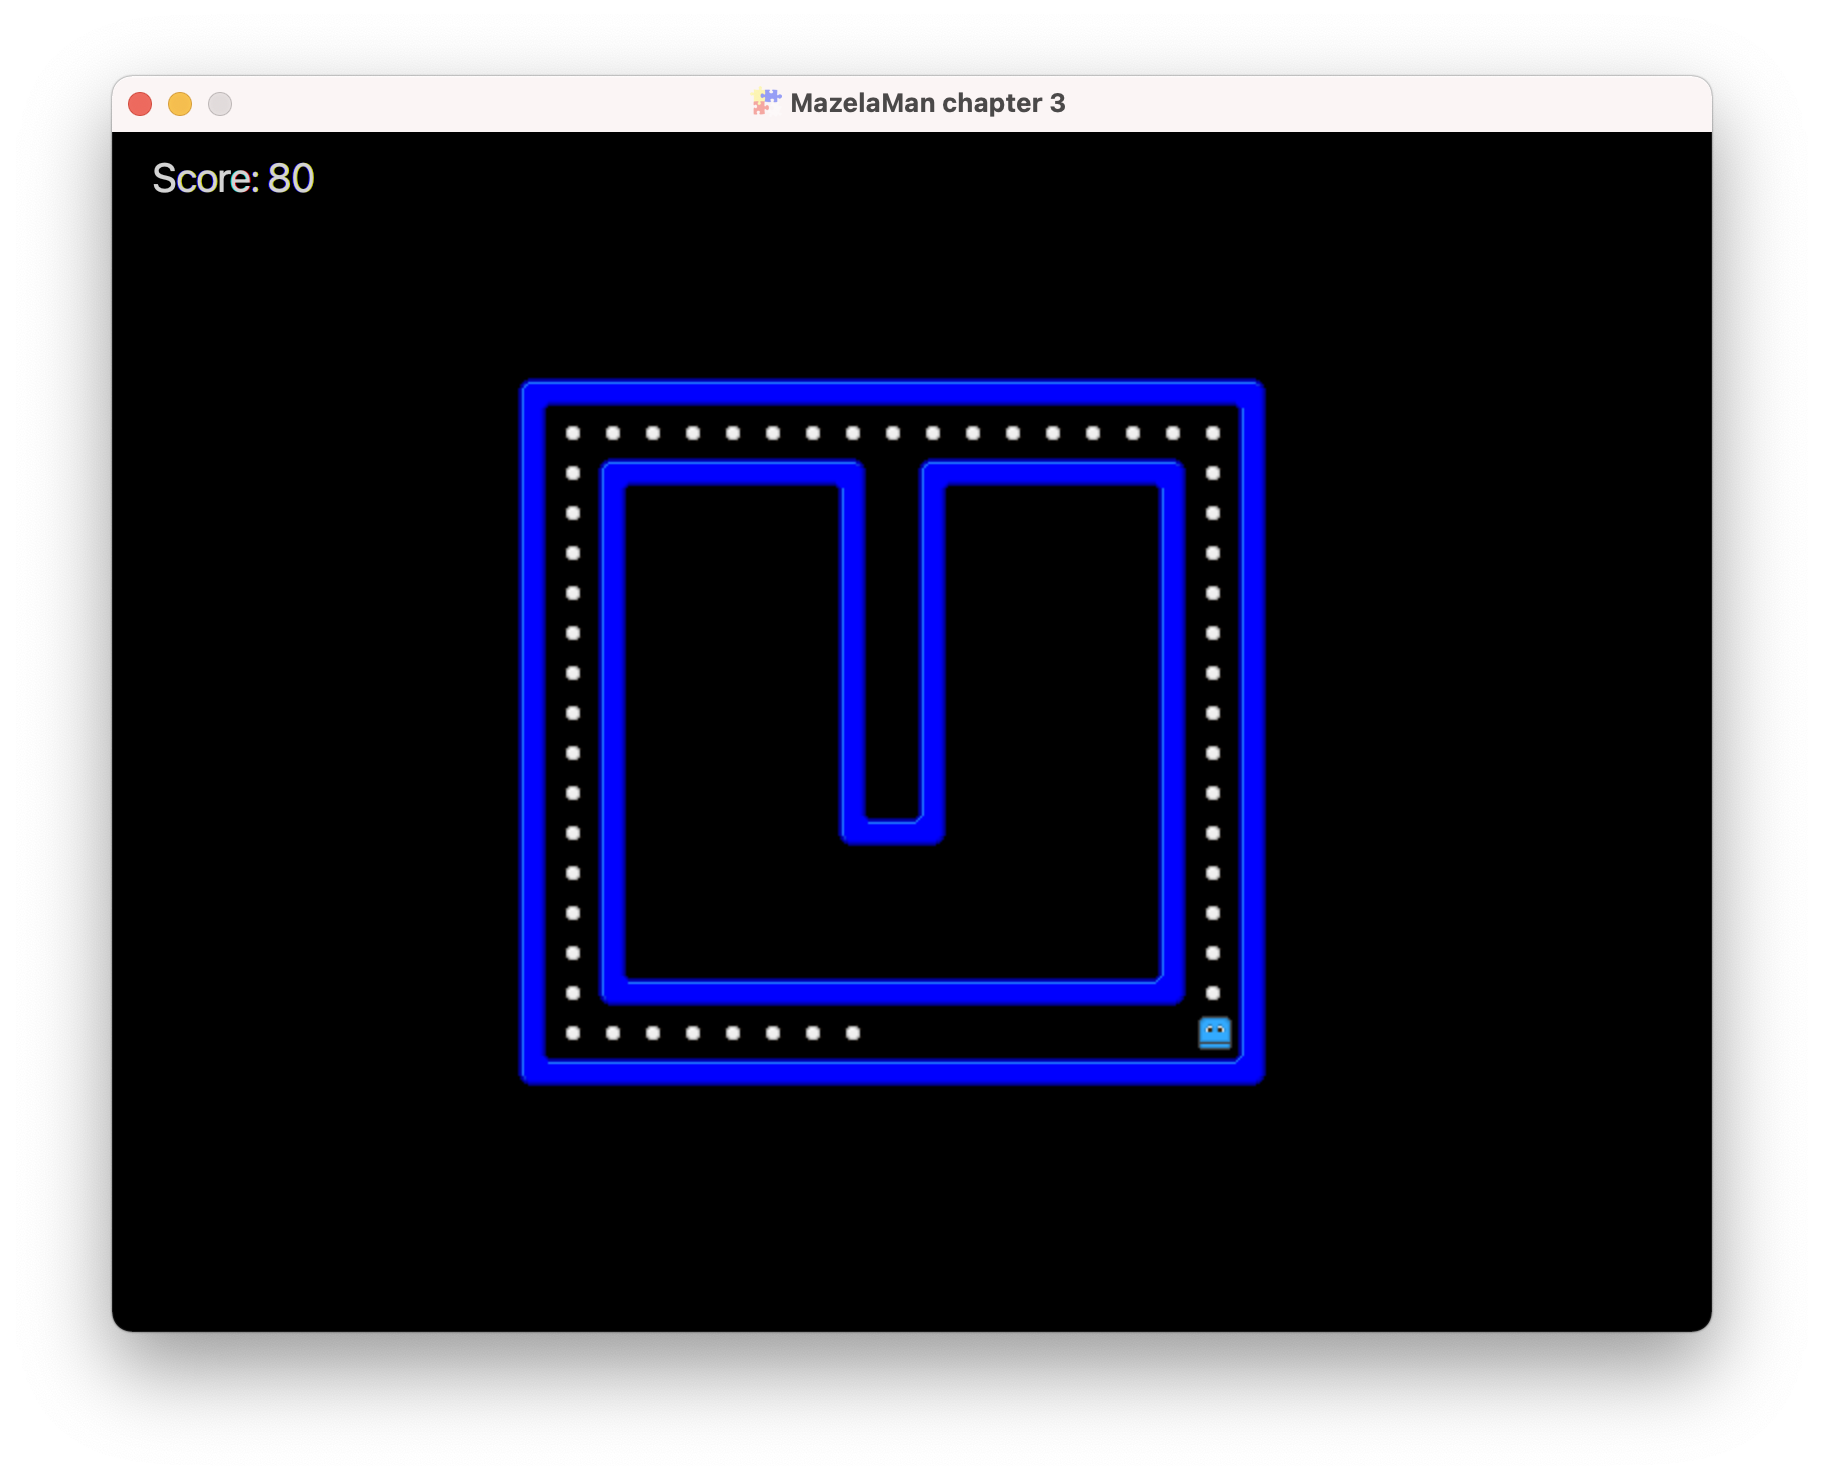
If you run the application again, the maze should be filled with pills, and the score should be displayed in the top left of the window.
In the next chapter we will add animation to the game.