09. Enable Main Menu
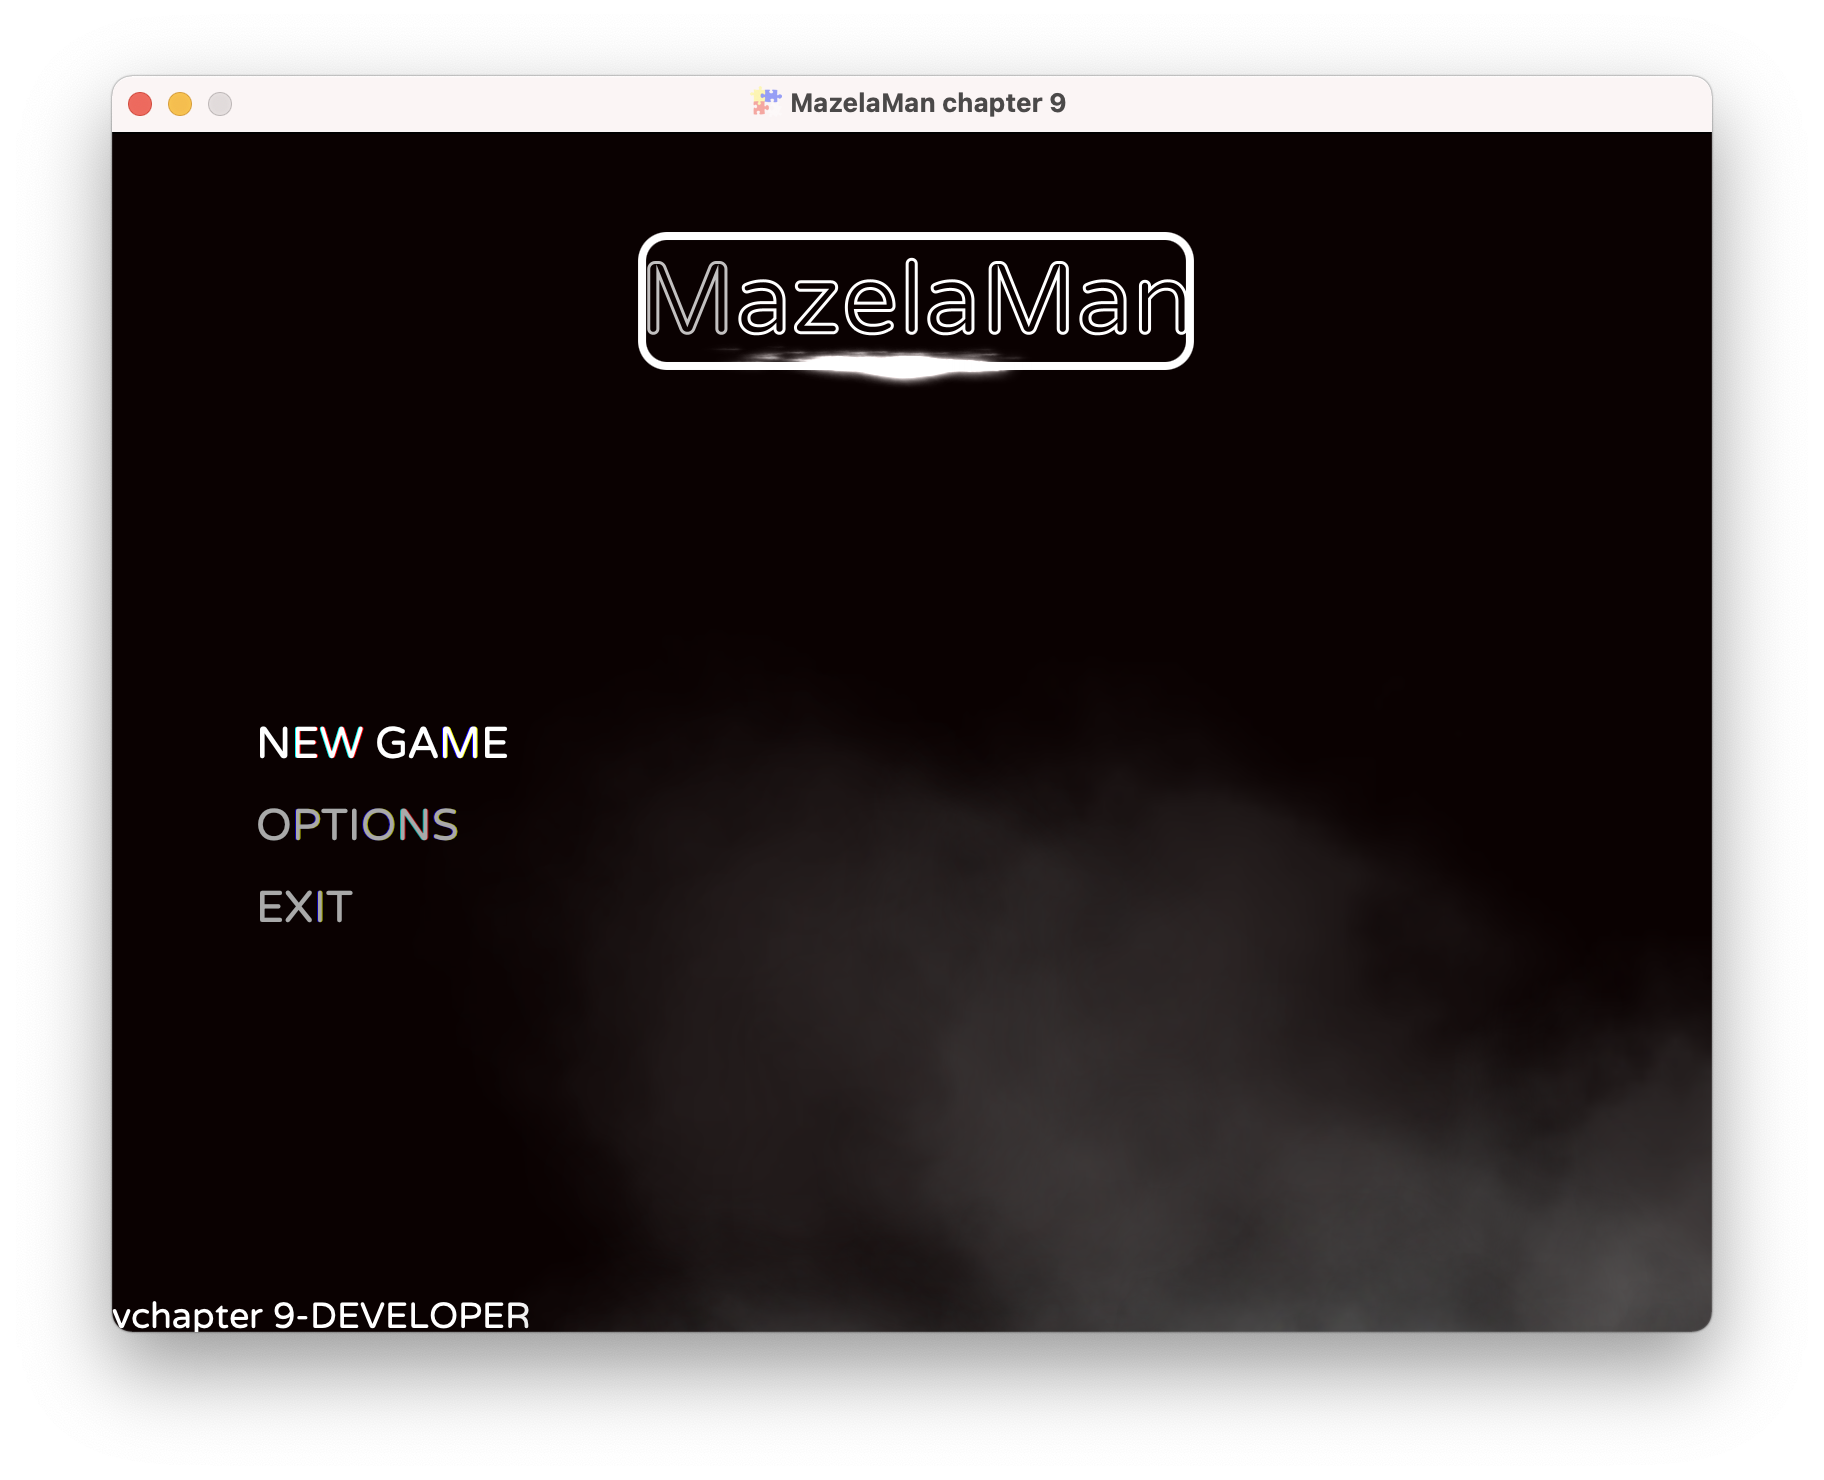
We have already seen the in-game menu that you get for free in FXGL. There is also a main menu that is displayed when the app starts, but it is not enabled by default. We will enable the main menu, and also add functionality to return to the main menu after a game has finished.
Enabling the main menu is as easy as a single line in initSettings. Check out the
GameSettings class for other settings you can set, for example the seed for the
random number generator.
settings.setMainMenuEnabled(true);
If you start the application now, it will begin by displaying the main menu.
Counting Lives
We want to return to the main menu when the game is over. The game can end in two ways.
Either the player runs out of lives, or the player finishes the last level. To implement
the first, we need to keep track of the number of lives left. That means a new game
variable that we initialize in initGameVars, a new UI label that we create in initUI,
and some counting in a collision handler.
vars.put("lives", 3);
    Label livesLabel = new Label();
    livesLabel.setTextFill(Color.LIGHTGRAY);
    livesLabel.setFont(Font.font(20.0));
    livesLabel.textProperty().bind(FXGL.getip("lives").asString("Lives: %d"));
    FXGL.addUINode(livesLabel, 640, 10);
    physics.addCollisionHandler(new CollisionHandler(EntityType.PLAYER, EntityType.GHOST) {
        @Override
        protected void onCollisionBegin(Entity player, Entity ghost) {
            FXGL.play("death.wav");
            FXGL.inc("lives", -1);
            if (FXGL.geti("lives") > 0) {
                FXGL.getGameWorld()
                        .getEntitiesByType(EntityType.GHOST)
                        .forEach(entity -> entity.getComponent(GhostComponent.class).respawn());
                player.getComponent(PlayerComponent.class).respawn();
            } else {
                gameOver(false);
            }
        }
    });
Now, when the player collides with a ghost, we decrease the number of lives. If there
are still lives left, we respawn the player and ghosts like before. If the number
of lives has reached 0, we instead call the gameOver method that we will create
shortly.
However, we will first make some changes to the code handling levels. We want to call
the gameOver method also when the player has finished the last level. We could create
a constant that holds the number of levels in the game, but then we would have to update
that constant whenever we add a new level. Instead, we settle for a more dynamic option
to catch the exception that is thrown when the next level is not found. Now we can just
create a new level file, and the game will automatically use that level.
Instead of calling setLevelFromMap directly from initLevel, we call a new method
setLevelFromMapOrGameOver.
    private void initLevel() {
        FXGL.spawn("Background", new SpawnData(0, 0).put("width", WIDTH).put("height", HEIGHT));
        setLevelFromMapOrGameOver();
        // Store the number of pills on this level
        FXGL.set("pills", FXGL.getGameWorld().getEntitiesByType(EntityType.PILL).size());
    }
    private void setLevelFromMapOrGameOver() {
        try {
            FXGL.setLevelFromMap("level" + FXGL.geti("level") + ".tmx");
        } catch (IllegalArgumentException e) {
            gameOver(true);
        }
    }
The exception we can catch is IllegalArgumentException which is a bit unspecific,
but it will have to do. If we catch the exception, we also call the gameOver method,
but this time with parameter true.
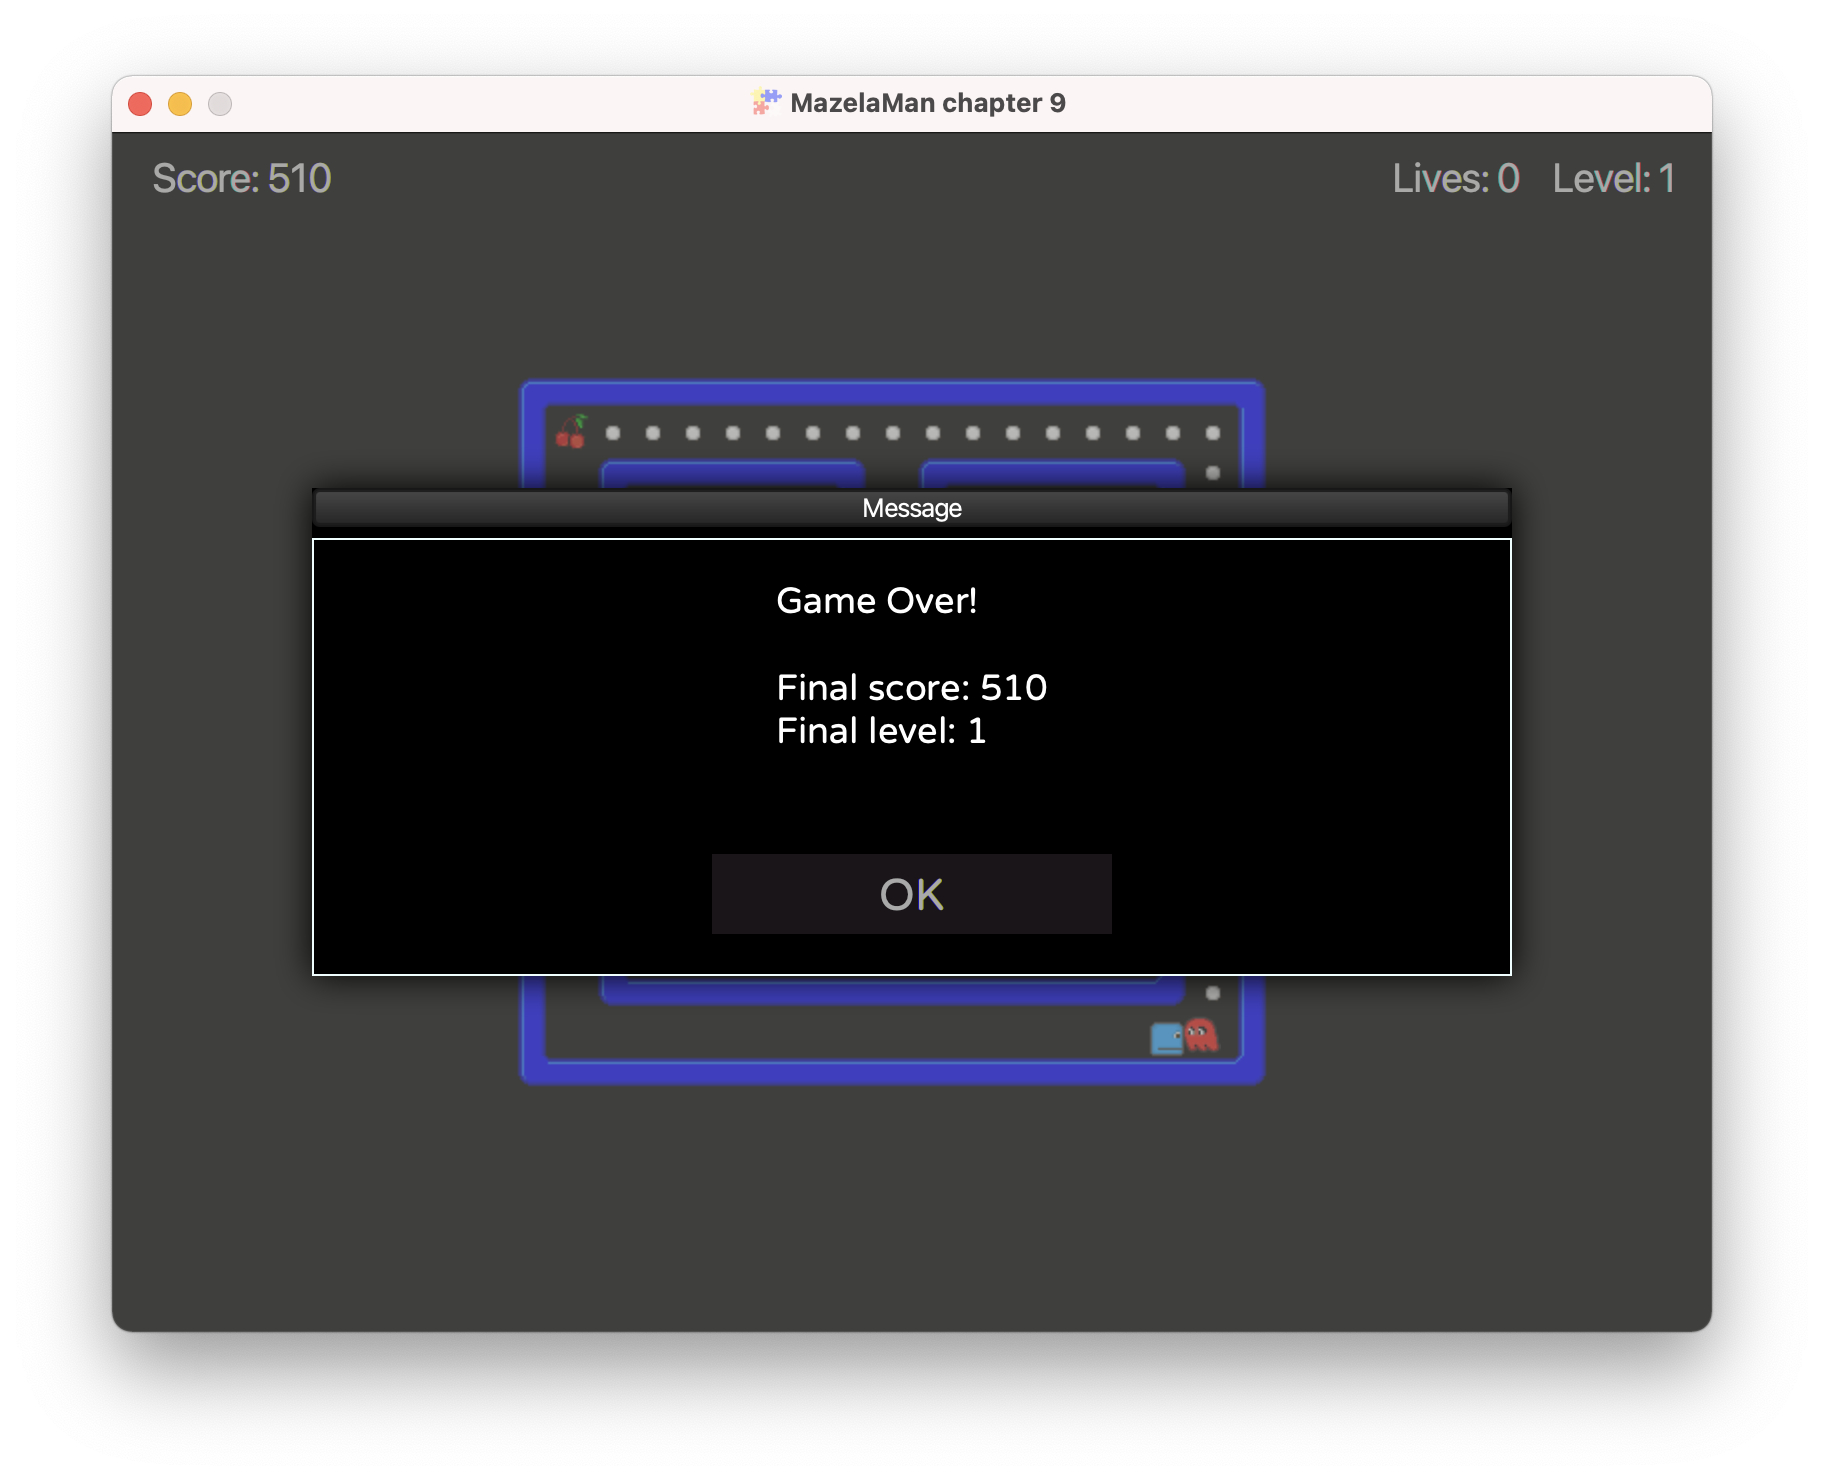
In the gameOver method we display a message dialog before returning to the main menu.
    private void gameOver(boolean reachedEndOfGame) {
        StringBuilder builder = new StringBuilder();
        builder.append("Game Over!\n\n");
        if (reachedEndOfGame) {
            builder.append("You have reached the end of the game!\n\n");
        }
        builder.append("Final score: ")
                .append(FXGL.geti("score"))
                .append("\nFinal level: ")
                .append(FXGL.geti("level"));
        FXGL.getDialogService().showMessageBox(builder.toString(), () -> FXGL.getGameController().gotoMainMenu());
    }
The boolean parameter tells us if the player reached the end of the game, or just died. We
want to display slightly different messages in the two cases. To display the dialog to the
player, we use the FXGL DialogService that we get from the FXGL facade. Besides
showMessageBox that we use, the dialog service provides several other types of dialogs,
like input dialogs, error dialogs, and progress dialogs. The showMessageBox method we use
take two input parameters. The first is the text to display, and the second is a Runnable
to run when the player clicks the OK button. In our case, the runnable we provide gets the
GameController from the facade, and tells it to go to the main menu. The GameController
can also do much more, like pausing the game engine or display a loading screen.
Running the game again, and running out of lives, will now produce something like this:
This is the end of this chapter. Now you can proceed to the next chapter, which currently is the end of the tutorial.